6. 新建 service/PersonService 接口及其实现类 service/impl/PersonServiceImplpackage com.example.hellospringboot.service;import com.example.hellospringboot.model.Person;import java.util.List;public interface PersonService {Integer insert(Person person);Integer update(Person person);Integer delete(int id);List<Person> select();}package com.example.hellospringboot.service.impl;import com.example.hellospringboot.mapper.PersonMapper;import com.example.hellospringboot.model.Person;import com.example.hellospringboot.service.PersonService;import org.springframework.beans.factory.annotation.Autowired;import org.springframework.stereotype.Service;import java.util.List;@Servicepublic class PersonServiceImpl implements PersonService {@AutowiredPersonMapper mapper;public Integer insert(Person person){return mapper.insert(person);}public Integer update(Person person){return mapper.updateById(person);}public Integer delete(int id){return mapper.deleteById(id);}public List<Person> select(){return mapper.selectList(null);}}我们给mapper新增了@Repository注解,可以让Service自动装载Mapper不报错
通过代码我们可以看到,继承自BaseMapper<Person>的PersonMapper,不加任何代码不写任何xml,就可以支持Person数据模型的常见的增删改查等操作,真的非常方便!
7. 新建 controller/PersonControllerpackage com.example.hellospringboot.controller;import com.example.hellospringboot.model.Person;import com.example.hellospringboot.service.PersonService;import org.springframework.beans.factory.annotation.Autowired;import org.springframework.web.bind.annotation.GetMapping;import org.springframework.web.bind.annotation.PostMapping;import org.springframework.web.bind.annotation.RequestMapping;import org.springframework.web.bind.annotation.RestController;import java.util.List;@RestController@RequestMapping("/person")public class PersonController {@AutowiredPersonService service;@PostMapping("/insert")public Integer insert(Person person){return service.insert(person);}@PostMapping("/update")public Integer update(Person person){return service.update(person);}@PostMapping("/delete")public Integer delete(int id){return service.delete(id);}@GetMapping("/select")public List<Person> select(){return service.select();}}我们这里使用了@RestController注解,这样可以非常方便的测试我们的业务逻辑
这里可以看到,insert、update、delete三个写方法我们使用了Post协议,select读方法使用了Get协议
其实标准的RestApi风格另外还有Put和Delete协议,这里其实没有严格的规定
由于Get协议的参数是直接暴露在url串里的,所以一般写方法我们不建议使用Get协议
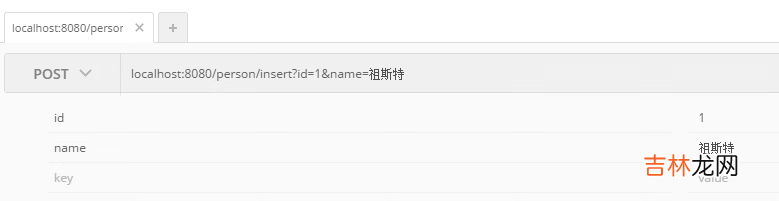
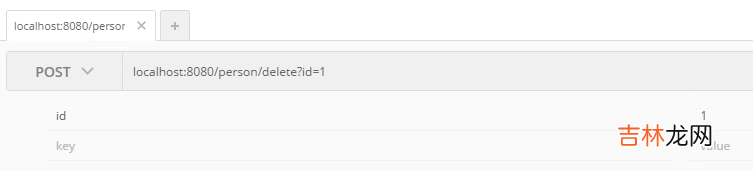
8. 使用Postman测试结果
文章插图
文章插图
文章插图

文章插图
文章插图
文章插图
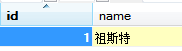
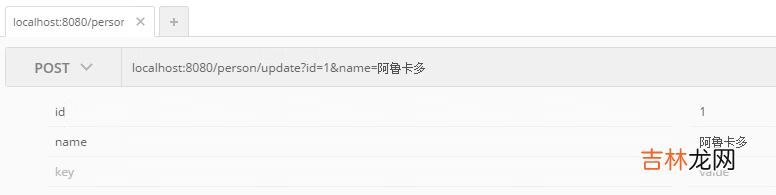
我们在请求参数中分别传入id和name,springboot框架会自动将其拼装成Person对象,真的是非常智能化!
另外,得益于mybatis-plus免xml的特性,我们不用自己手写任何的xml逻辑实现,甚至通篇未出现任何大家常见的mybatis相关配置!
以上 。
本节内容我们介绍了数据持久化的相关操作,并且是基础传统的关系型数据库——mysql
下一节我们将共同探讨如何使用SpringBoot整合redis及mongodb,敬请期待!
【之三 2流高手速成记:SpringBoot整合mybatis/mybatis-plus实现数据持久化】
经验总结扩展阅读


- 什么是六步洗手法
- 微信钱包怎么充流量
- 我的手机总是后台偷跑流量怎么办?
- 就业报到证的改派流程
- 如何查询流量
- 成都买房贷款流程是什么
- vivo怎么设置流量套餐
- 商标注册流程大概需要多长时间
- 安徽移动抢流量怎么领取
- Linux make编译