
文章插图
实现方法

文章插图

文章插图
//搜索动作ModelBussiness.prototype.searchActionSate = false;ModelBussiness.prototype.searchAddObjNames = [];ModelBussiness.prototype.searchAction = function (result) {layer.load();var _this = this;WT3DObj.commonFunc.changeCameraPosition({ x: 1138.6583366079776, y: 7190.772604284317, z: 9690.731322273507 }, { x: 5051.345919026784, y: 678.7143248996384, z: 2255.8201639552867 }, 500,function () {modelBussiness.cancelSearchAction(function () {var type="";if (window.location.href.indexOf("index.html") >= 0) {type = "jzx";}_this.searchActionSate = true;var resultobj={};$.each(result, function (_index, _obj) {//areaId: "F5"//id: "cf792a67-bfed-488b-8570-915a73341777"//name: "20006010-2-2"resultobj["g_" + _obj.id] = _obj;});var models = [];var objs = [];modelBussiness.searchAddObjNames = [];$.each(WT3DObj.scene.children, function (_index, _obj) {//areaId: "F5"//id: "cf792a67-bfed-488b-8570-915a73341777"//name: "20006010-2-2"if (!_obj.oldPositionY && _obj.oldPositionY != 0) {_obj.oldPositionY = _obj.position.y;}if (_obj.name.indexOf("location2_") == 0) {_obj.visible = false;_obj.position.y = 1000000;}if (_obj.name.indexOf("g_") == 0) {objs.push(_obj);var cobj = resultobj[_obj.name.split("_Area_")[0]];if (cobj) {modelBussiness.searchAddObjNames.push("gSearch_" + cobj.id + "_name_" + cobj.name);var cacheobj= _this.cacheGoodsResult["c_" + cobj.id];models.push(createGoodCubeModels("gSearch_" + cobj.id + "_name_" + cobj.name, cobj.name, _obj.position, { x: _obj.scale.x * 100, y: _obj.scale.y * 100, z: _obj.scale.z * 100 }, type, cacheobj ? cacheobj.color : 0));_obj.visible = false;_obj.position.y = 1000000;}}});if (models && models.length > 0) {WT3DObj.commonFunc.loadModelsByJsons(models, { x: 0, y: 0, z: 0 }, { x: 0, y: 0, z: 0 }, true, function () {WT3DObj.commonFunc.changeObjsOpacity(objs, 1, 0.1, 500, function () {layer.closeAll();});});} else {WT3DObj.commonFunc.changeObjsOpacity(objs, 1, 0.1, 500, function () {layer.closeAll();});}});});}二、实现逻辑
2.1、建模
2.1.1、创建园区整体模型

文章插图
这里的道路直接用亮线画出道路框架即可 , 然后通过流动的光线模拟车流 , 这在前面的文章中有详细讲解 。
2.1.2、创建室内库房模型
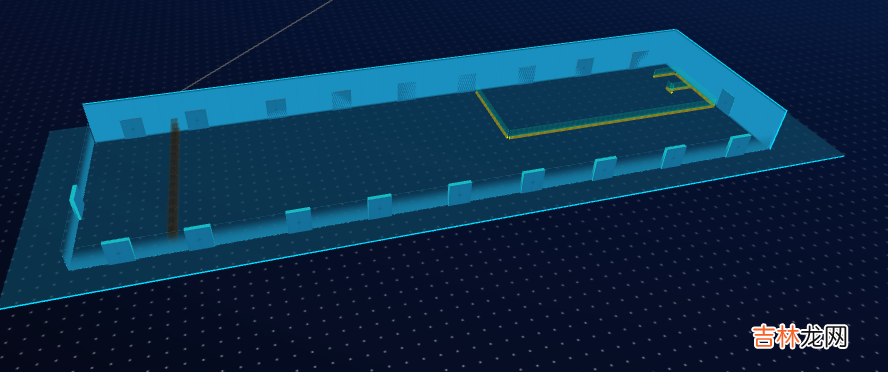
文章插图
这里的模型通过代码实现 , 篇幅过长 , 不便展示 。
2.1.3、创建箱子模型
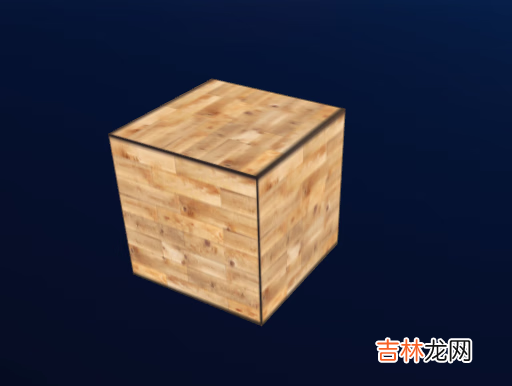
文章插图
{ "show": true, "uuid": "", "name": name, "objType": "ExtrudeGeometry", "position": { "x": position.x, "y": position.y, "z": position.z }, "style": { "skinColor": 16711680, "skin": { "skin_up": { "skinColor": color1, "side": 1, "opacity": 1, "imgurl": imgurl1, "repeatx": true, "width": 0.01, "repeaty": true, "height": 0.01 }, "skin_down": { "skinColor": 16777215, "side": 1, "opacity": 1 }, "skin_side": { "skinColor": color2, "opacity": 1, "imgurl": imgurl2, "repeatx": true, "width": 0.01, "repeaty": true, "height": 0.01 } } }, "scale": { "x": size.x / 100, "y": size.y / 100, "z": size.z / 100 }, "shapeParm": { "points": [{ "x": 0, "y": 0, "type": "nomal" }, { "x": 0, "y": 100, "type": "nomal" }, { "x": 100, "y": 100, "type": "nomal" }, { "x": 100, "y": 0, "type": "nomal" }], "holes": [] }, "extrudeSettings": { "amount": 100, "curveSegments": 1, "steps": 1, "bevelEnabled": false, "bevelThickness": 1, "bevelSize": 1, "bevelSegments": 1, "extrudePathPoints": [] }, "showSortNub": 100, "customType1": "", "customType2": "", "animation": null, "dbclickEvents": null, "rotation": [{ "direction": "x", "degree": 0 }, { "direction": "y", "degree": 0 }, { "direction": "z", "degree": 0 }], "BindDevId": null, "BindDevName": null, "devInfo": null, "BindMeteId": null, "BindMeteName": null }
经验总结扩展阅读


- 如何解决月经量少
- 白带像发黄的浓鼻涕
- 备孕多久没有怀孕是不孕吗
- 精子带一点点血丝
- 备孕子宫内膜如何调理
- 免费领的避孕套干净吗
- 卵巢功能减退如何备孕
- 腹腔镜手术后保养如何做
- 马服是什么梗
- 龙猫是什么动物 龙猫如何养殖