文章插图
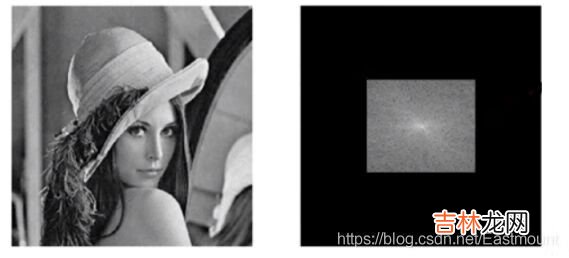
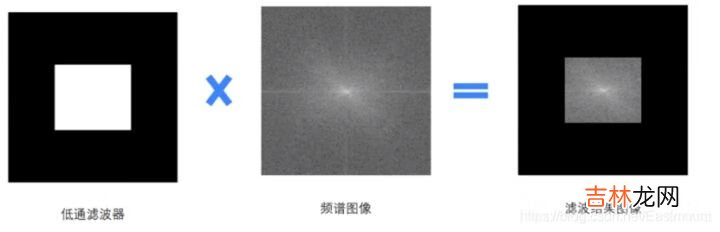
那么 , 如何构造该滤波图像呢?如下图所示 , 滤波图像是通过低通滤波器和频谱图像形成 。其中低通滤波器中心区域为白色255 , 其他区域为黑色0 。
文章插图
低通滤波器主要通过矩阵设置构造 , 其核心代码如下:
rows, cols = img.shapecrow,ccol = int(rows/2), int(cols/2)mask = np.zeros((rows, cols, 2), np.uint8)mask[crow-30:crow+30, ccol-30:ccol+30] = 1通过低通滤波器将模糊图像的完整代码如下所示:
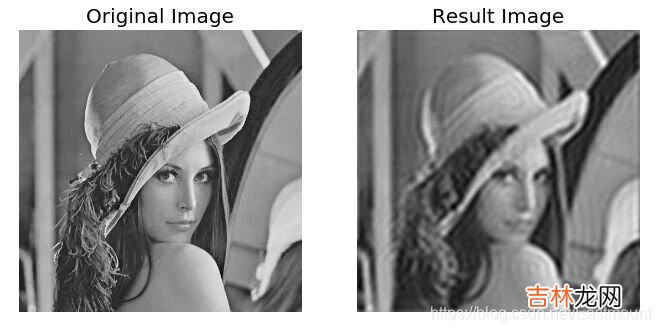
# -*- coding: utf-8 -*-import cv2import numpy as npfrom matplotlib import pyplot as plt#读取图像img = cv2.imread('lena.bmp', 0)#傅里叶变换dft = cv2.dft(np.float32(img), flags = cv2.DFT_COMPLEX_OUTPUT)fshift = np.fft.fftshift(dft)#设置低通滤波器rows, cols = img.shapecrow,ccol = int(rows/2), int(cols/2) #中心位置mask = np.zeros((rows, cols, 2), np.uint8)mask[crow-30:crow+30, ccol-30:ccol+30] = 1#掩膜图像和频谱图像乘积f = fshift * maskprint f.shape, fshift.shape, mask.shape#傅里叶逆变换ishift = np.fft.ifftshift(f)iimg = cv2.idft(ishift)res = cv2.magnitude(iimg[:,:,0], iimg[:,:,1])#显示原始图像和低通滤波处理图像plt.subplot(121), plt.imshow(img, 'gray'), plt.title('Original Image')plt.axis('off')plt.subplot(122), plt.imshow(res, 'gray'), plt.title('Result Image')plt.axis('off')plt.show()输出结果如图所示 , 第一幅图为原始“Lena”图 , 第二幅图为低通滤波器模糊处理后的图像 。
文章插图
点击关注 , 第一时间了解华为云新鲜技术~
经验总结扩展阅读


- Python中dataclass库
- 【Python+C#】手把手搭建基于Hugging Face模型的离线翻译系统,并通过C#代码进行访问
- Python实现给图片加水印功能
- python爬虫是什么
- python-函数-统计函数
- 第三周python作业
- python是什么意思?
- python和java究竟哪个更值得学?
- anaconda怎么运行python程序?
- 怎么安装python 安装python步骤