方法如下:
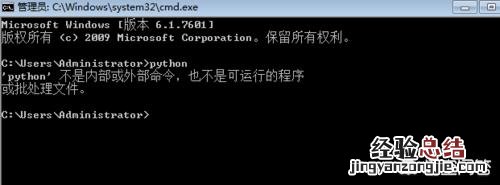
1、pip是依赖python的,首先检查下windows机器上有没有安装python,或者有没有添加到环境变量中,如果都没有需要安装或者加入环境变量
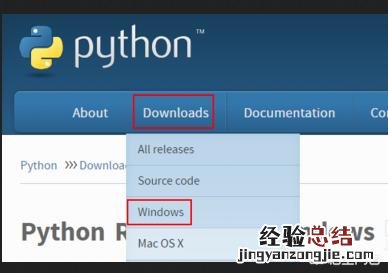
2、下载并安装python,选择和自己操作系统匹配的版本进行下载,我这里下载的是Windows 64位 2.7.14 , 有很多模块不支持python3,所以还是选择python2.x中最新也是最后一个版本 。
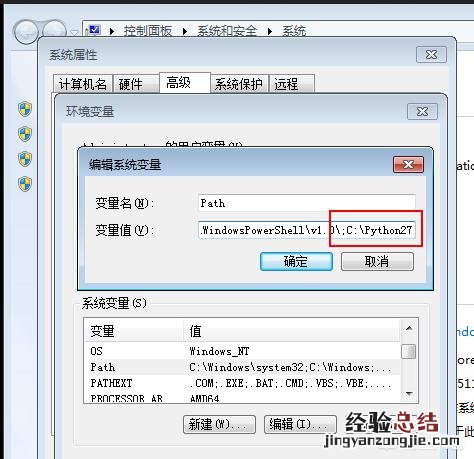
3、配置好python的环境变量 , 将python的安装路径C:\Python27配置在path中即可
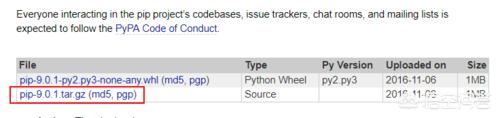
4、安装pip,将pip的tar包下载到本地并解压,这个tar.gz格式的是windows和linux通用的包 , 在Windows下用常规的解压工具即可解压,下载地址如下
https://pypi.python.org/pypi/pip#downloads
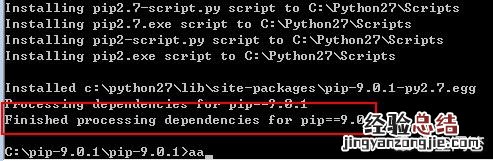
5、进入到pip的解压目录,执行python setup.py install进行安装 , 安装完成之后出现finished说明安装成功 。
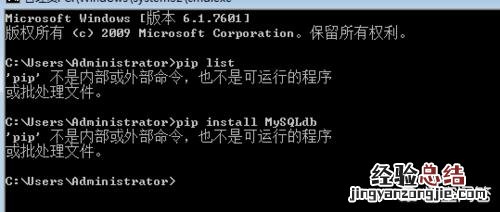
6、执行pip命令的提示找不到这个命令,需要将pip的安装路径加入到环境变量中,路径一般为python所在目录的Scripts目录中
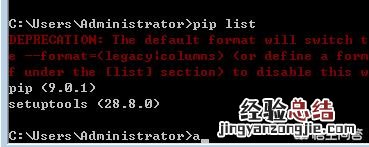
7、下图是环境变量添加成功之后,执行pip list成功,现在pip已经安装成功了,可以用来安装python的一些模块了
【Windows如何安装pip3 - 经验总结 www.jingyanzongjie.com】