Python嵌入式打包过程目录
- python嵌入式打包过程" rel="external nofollow noreferrer">Python嵌入式打包过程
- 下载嵌入式包
- 解压和配置
- 安装pip和其他依赖
- 启动项目
python嵌入式打包:将python环境与项目代码打包到同一个文件夹中,在其他没有项目依赖的电脑中运行项目
对比pyinstaller
对于我个人来说,嵌入式打包比pyinstaller打包成exe更容易调试 。pyinstaller对于多文件的项目来说,打包后会导致文件位置改变,项目依赖不容易同时打包进去 。而嵌入式打包就完美的解决了项目文件位置的改变和依赖问题 。

文章插图
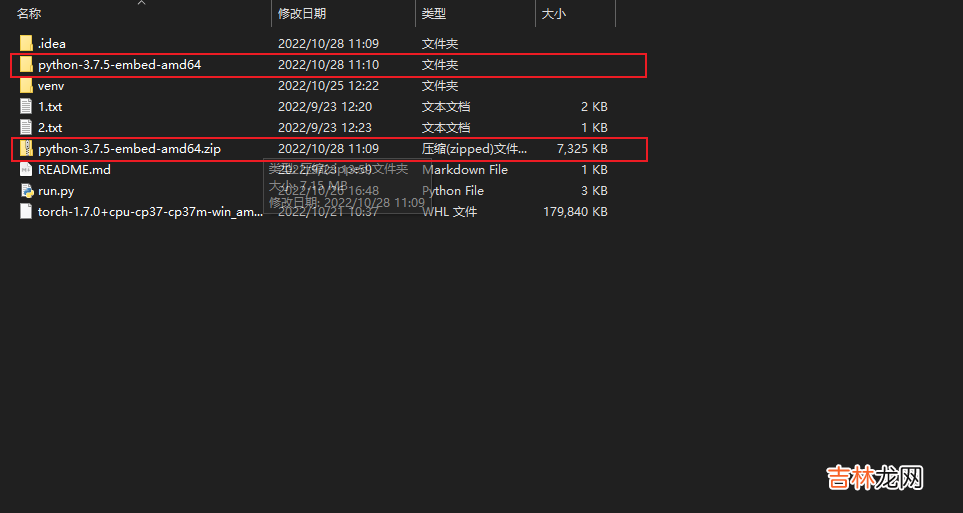
首先看项目结构,只有一个run.py文件,需求是要将这个服务可以部署到其他windows电脑中
下载嵌入式包点击这里,下载你想要的版本
我选择的是3.7.5这个版本,可以根据不同需求下载不同版本

文章插图
解压和配置下载后将这个zip包解压到项目同一目录
文章插图
找到并进入解压后的文件夹然后编辑以
.pth或._pth为后缀的文件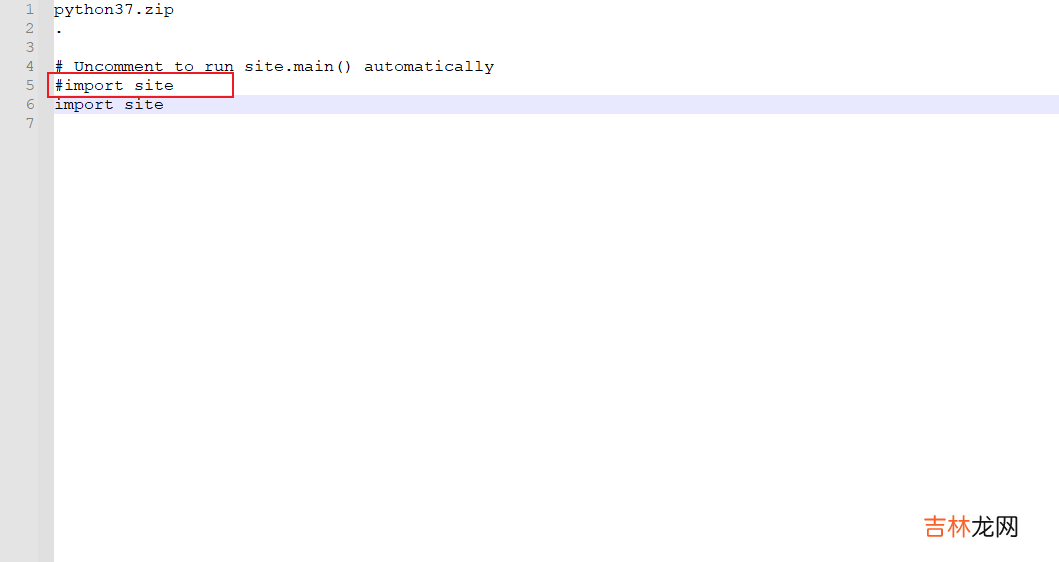
文章插图
将import site取消注释并保存关闭文件
在此目录新建
get-pip.py这个文件,然后将这个页面中的所有文本复制到这个文件
文章插图
安装pip和其他依赖

文章插图
在这里输入cmd回车
然后输入
python.exe get-pip.py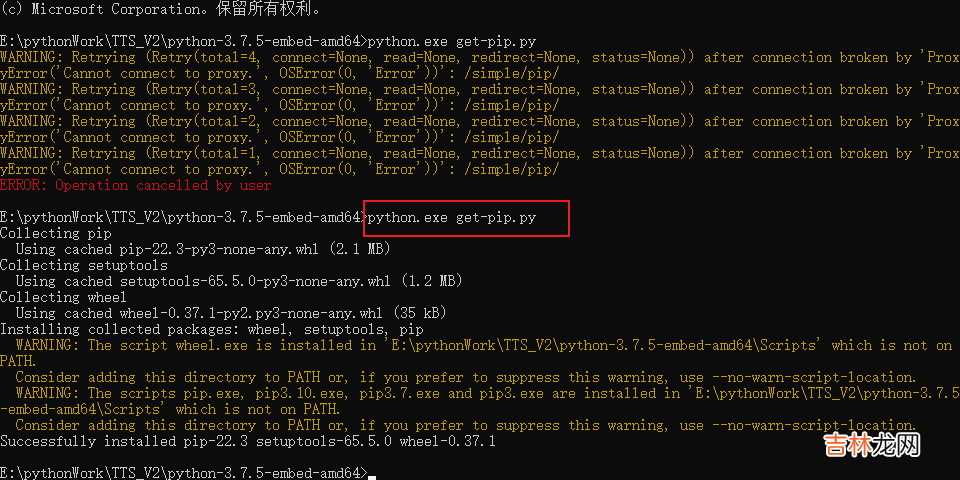
文章插图
警告不用管

文章插图
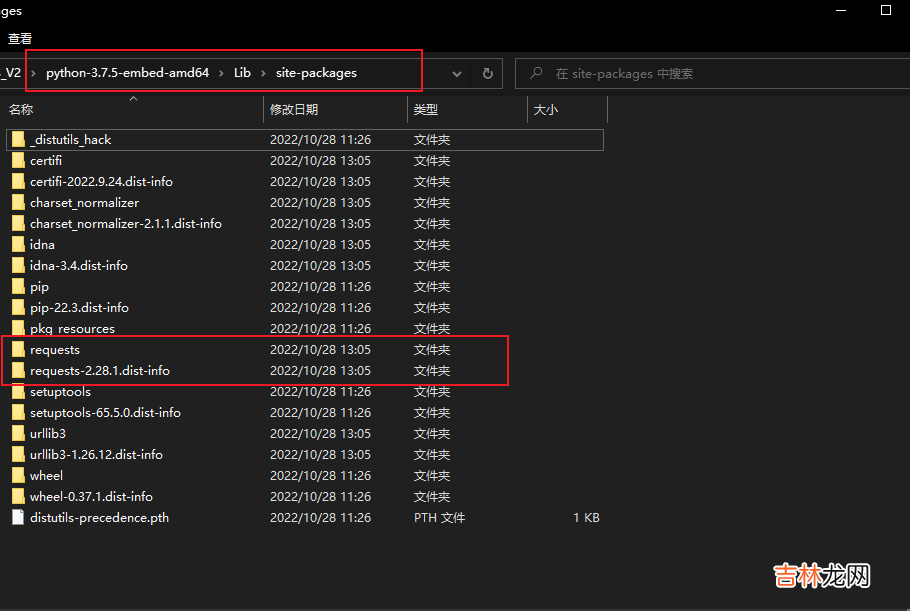
安装完成后就会看到这两个文件夹
Lib里面装的是pip安装的包Script里面装的是pip这个可执行文件
文章插图
在当前目录使用
Script\pip.exe install xxx 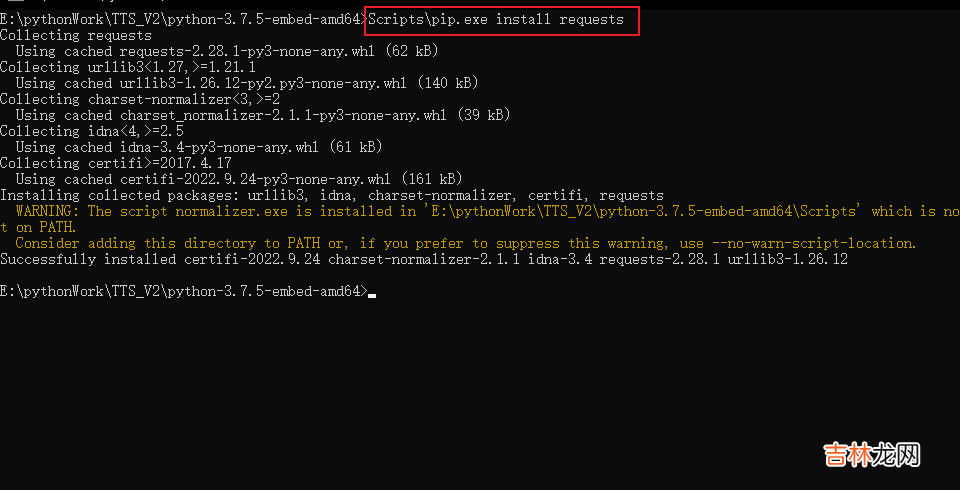
文章插图
在这里就可以看到你安装的第三方库了
文章插图
启动项目回到项目根目录,然后创建一个bat脚本
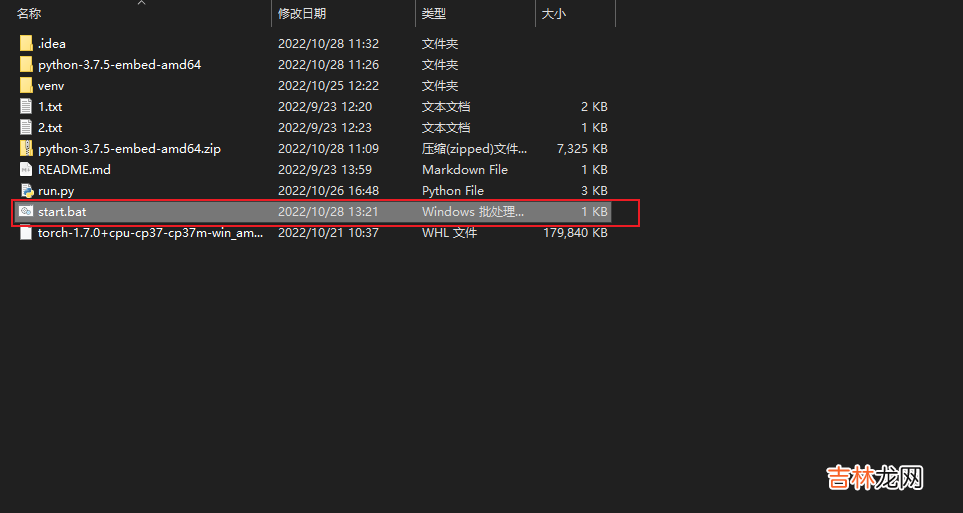
文章插图
打开编辑
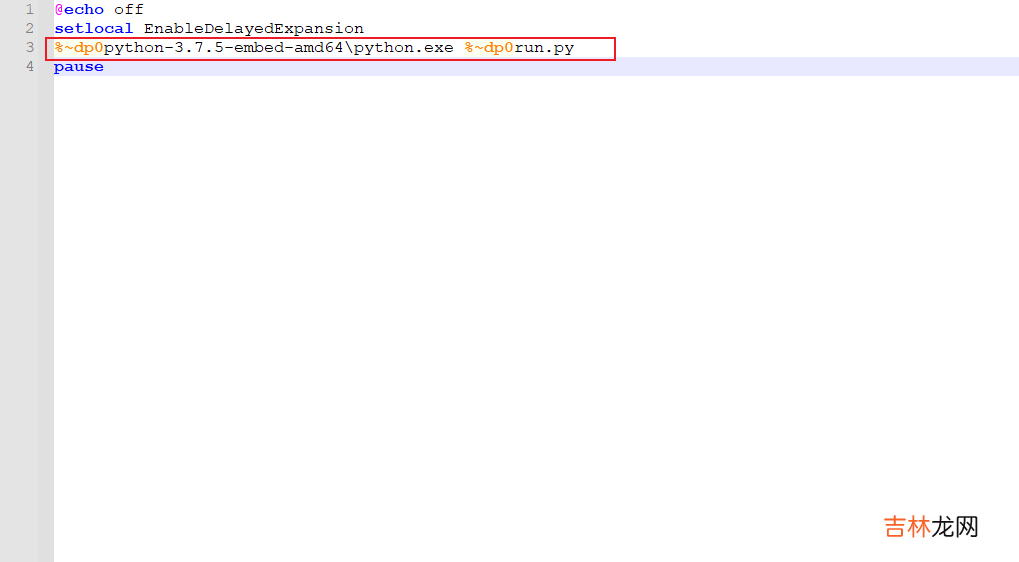
文章插图
%~dp0是求出当前脚本的绝对路径,然后后面拼接上你要使用的文件在cmd里使用这个脚本就可以使用了
最后将这个目录打包起来,这个项目就可以在其他电脑快速使用了
【图文 Python 嵌入式打包】
经验总结扩展阅读


- 3 Python全栈工程师之从网页搭建入门到Flask全栈项目实战 - 入门Flask微框架
- 跟我学Python图像处理丨图像特效处理:毛玻璃、浮雕和油漆特效
- 四 Selenium4.0+Python3系列 - 常见元素操作(含鼠标键盘事件)
- 二、python基本数据类型
- 图文详解 微服务 Zipkin 链路追踪原理
- python3使用mutagen进行音频元数据处理
- Python 根据两个字段排序 中文排序 汉字排序 升序 降序
- python渗透测试入门——基础的网络编程工具
- Python学习三天计划-3
- 痞子衡嵌入式:i.MXRT中FlexSPI外设不常用的读选通采样时钟源 - loopbackFromSckPad