154配置
! Configuration File for keepalivedglobal_defs {router_id haproxyks##标识节点的字符串 , 通常为hostname}vrrp_script chk_haproxy {script "/etc/keepalived/haproxy_check.sh"##执行脚本位置interval 2##检测时间间隔weight -20##如果条件成立则权重减20}vrrp_instance VI_1 {state BACKUP## 主节点为MASTER , 备份节点为BACKUPinterface ens33 ## 绑定虚拟IP的网络接口(网卡) , 与本机IP地址所在的网络接口相同(我这里是eth0)virtual_router_id 74## 虚拟路由ID号(主备节点一定要相同)mcast_src_ip 192.168.247.154 ## 本机ip地址priority 80##优先级配置(0-254的值)nopreemptadvert_int 1## 组播信息发送间隔 , 俩个节点必须配置一致 , 默认1sauthentication {## 认证匹配auth_type PASSauth_pass bhz}track_script {chk_haproxy}virtual_ipaddress {192.168.247.160## 虚拟ip , 可以指定多个}}编写自动检测脚本touch /etc/keepalived/haproxy_check.shchmod +x /etc/keepalived/haproxy_check.shvi /etc/keepalived/haproxy_check.sh脚本内容
#!/bin/bashCOUNT=`ps -C haproxy --no-header |wc -l`if [ $COUNT -eq 0 ];then/usr/local/haproxy/sbin/haproxy -f /etc/haproxy/haproxy.cfgsleep 2if [ `ps -C haproxy --no-header |wc -l` -eq 0 ];thenkillall keepalivedfifi启动# 记得先启动haproxy, 再启动Keepalived/usr/local/haproxy/sbin/haproxy -f /etc/haproxy/haproxy.cfg# 查看进程ps -ef | grep haproxy# 将Keepalived注册为系统服务cd /home/software/keepalived-2.0.18/keepalived/etc/cp init.d/keepalived /etc/init.d/cp sysconfig/keepalived /etc/sysconfig/systemctl daemon-reload# 启动Keepalivedsystemctl [start | stop | status | restart] keepalivedsystemctl start keepalived.servicesystemctl stop keepalived.service# 查看服务ps -ef|grep keepalived高可用测试

文章插图
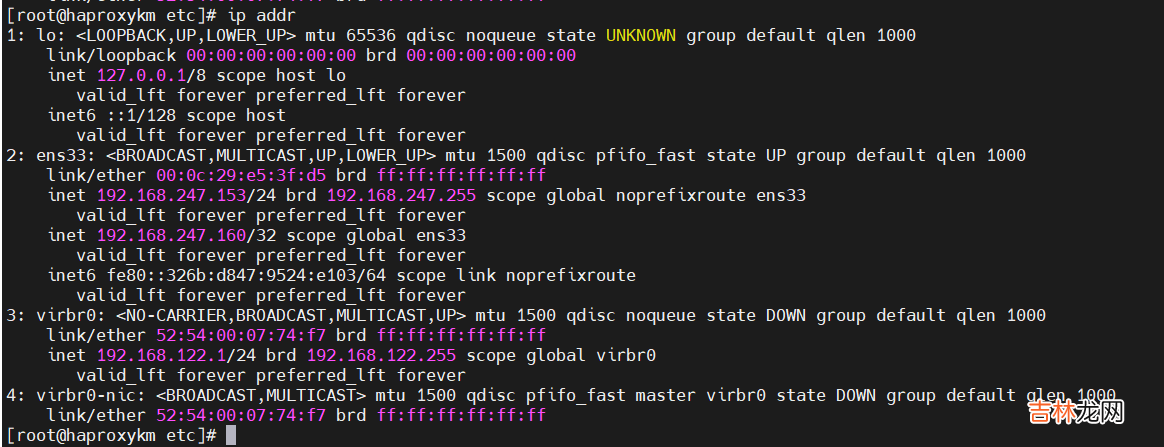
160默认在153主Keepalived上
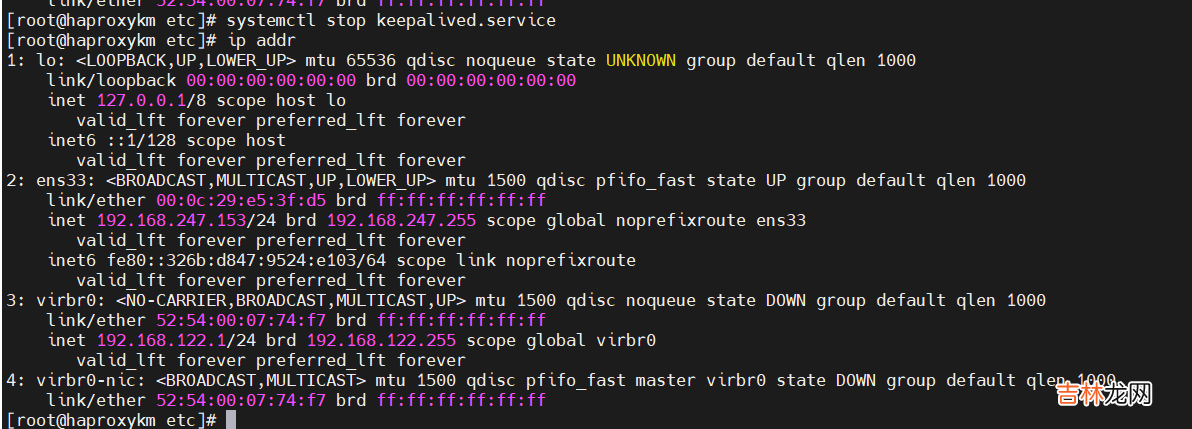
节点宕机测试停止153上的keepalived

文章插图
查看153 ip

文章插图
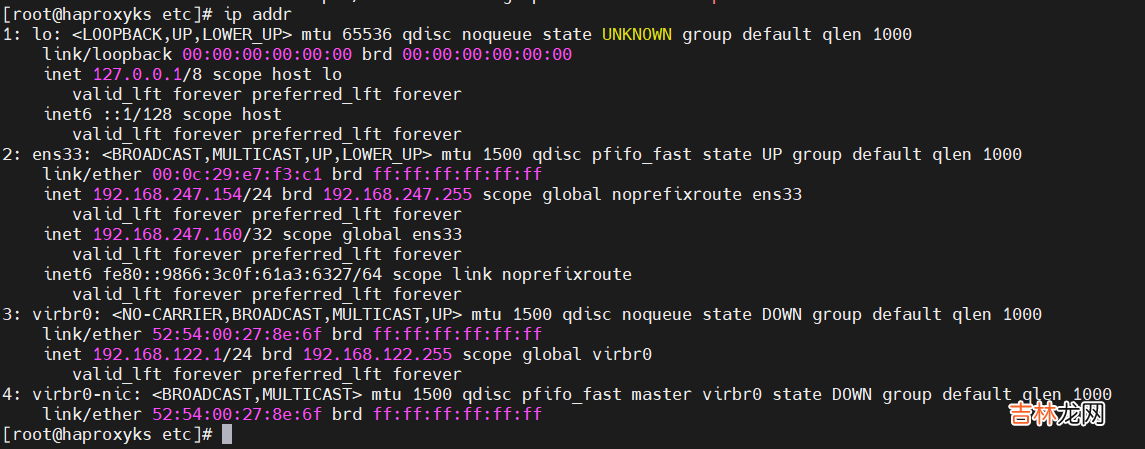
160的vip已经不再了, 查看154

文章插图
已经自动绑定154了, 重启153

文章插图

文章插图
重启后160重新漂移回153上, 高可用测试ok
队列功能代码测试直接使用最简单的hello world程序测试, IP使用虚拟的VIP 160
消费者
package com.dance.redis.mq.rabbit.helloworld;import com.rabbitmq.client.*;import java.io.IOException;import java.util.concurrent.TimeUnit;import java.util.concurrent.TimeoutException;public class Receiver {private static final String QUEUE_NAME = "queue-test";private static final String IP_ADDRESS = "192.168.247.160";private static final int PORT = 5672;public static void main(String[] args) throws IOException, TimeoutException,InterruptedException {Address[] address = new Address[]{new Address(IP_ADDRESS, PORT)};ConnectionFactory factory = new ConnectionFactory();factory.setUsername("toor");factory.setPassword("123456");// 这里的连接方式与生产者的demo略有不同 , 注意区别 。Connection connection = factory.newConnection(address); //创建连接final Channel channel = connection.createChannel();//创建信道channel.basicQos(64);//设置客户端最多接收未被ack的消息个数Consumer consumer = new DefaultConsumer(channel) {@Overridepublic void handleDelivery(String consumerTag,Envelope envelope,AMQP.BasicProperties properties,byte[] body)throws IOException {System.out.println("recvive message:" + new String(body));try {TimeUnit.SECONDS.sleep(1);} catch (InterruptedException e) {e.printStackTrace();}channel.basicAck(envelope.getDeliveryTag(), false);}};channel.basicConsume(QUEUE_NAME, consumer);//等待回调函数执行完毕之后 , 关闭资源 。TimeUnit.SECONDS.sleep(50);channel.close();connection.close();}}
经验总结扩展阅读
- centos7中配置java + mysql +jdk+使用jar部署项目
- 云原生下基于K8S声明式GitOps持续部署工具ArgoCD实战-上
- 黑暗游侠故事
- opencvcv.line
- 基于 Apache Hudi 极致查询优化的探索实践
- 14 基于SqlSugar的开发框架循序渐进介绍-- 基于Vue3+TypeScript的全局对象的注入和使用
- 【Python+C#】手把手搭建基于Hugging Face模型的离线翻译系统,并通过C#代码进行访问
- 基于Qt Designer和PyQt5的桌面软件开发--环境搭建和入门例子
- 唐代皇帝顺序
- 民意是什么


