image的矩形(裁剪)选择框的高度 。使用负值将翻转这个图像 。
image 的左上角在目标画布上 X 轴坐标 。image 的左上角在目标画布上 Y 轴坐标 。image 在目标画布上绘制的宽度 。允许对绘制的 image 进行缩放 。如果不说明,在绘制时 image 宽度不会缩放 。注意,这个参数不包含在 3 参数语法中 。image 在目标画布上绘制的高度 。允许对绘制的 image 进行缩放 。如果不说明,在绘制时 image 高度不会缩放 。注意,这个参数不包含在 3 参数语法中 。切割&渲染这里我们主要是将一张图片切割成一个个的小碎片,是这些碎片拼起来就是一张完整的图片 。
class ChipBanner {constructor() {this.cvs = document.querySelector("#chip");this.ctx = this.cvs.getContext("2d");this.imgList = document.querySelectorAll(".bg");this.imgIndex = 0;this.isAnimating = false;this.imgW = 800; //图片原始宽/高this.imgH = 530;this.conW = 800; //画布宽/高this.conH = 530;this.dw = 16; //画布单元宽/高this.dh = 15;this.I = this.conH / this.dh; //单元行/列数this.J = this.conW / this.dw;this.DW = this.imgW / this.J; //原图单元宽/高this.DH = this.imgH / this.I;}init() {this.ctx.beginPath();for (let i = 0; i < this.I; i++) {for (let j = 0; j < this.J; j++) {this.chipDraw(this.imgList[this.imgIndex], i, j);}}this.ctx.closePath();this.ctx.stroke();}drawText() {this.ctx.font = "150px serif";this.ctx.strokeStyle = "white";this.ctx.strokeText("1024", 500, 500);}chipDraw(img, i, j) {this.drawText();//负责绘制,i: 单元行号;j: 单元列号this.ctx.drawImage(img,this.DW * j,this.DH * i,this.DW,this.DH,this.dw * j,this.dh * i,this.dw,this.dh);}}这里正确拼出来看到的和正常图片没有任何区别
文章插图
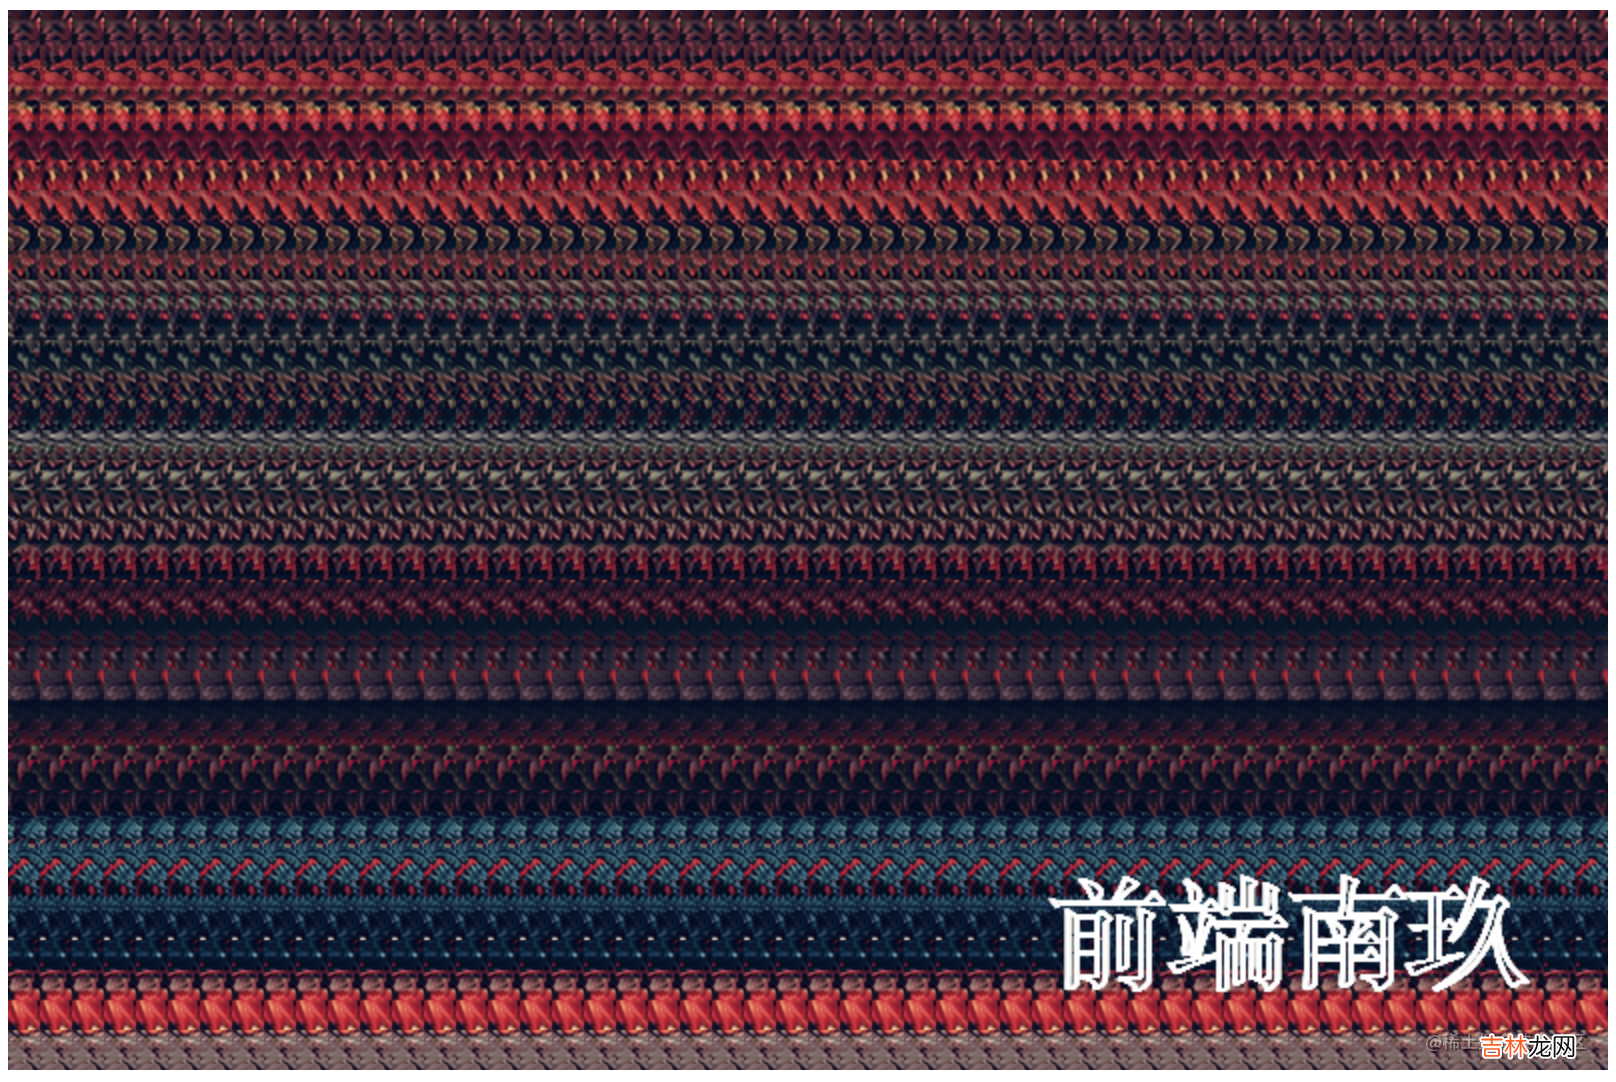
再来看一张拼错的图

文章插图
刚开始几何坐标那里没写对,拼出来就成这样了,哈哈,看着就像动画帧卡住的样子 。
动画这里主要是要找出某个点周围棱形范围内的所有点的坐标,然后在清除这些坐标图案的同时,开始绘制下一张图片 。
菱形线上的点与坐标的 行号差值的绝对值 + 列号差值的绝对值 = 距离
找出坐标棱形范围内所有的点
countAround(i, j, dst) {let arr = [];for (let m = i - dst; m <= i + dst; m++) {for (let n = j - dst; n <= j + dst; n++) {if (Math.abs(m - i) + Math.abs(n - j) == dst &&m >= 0 &&n >= 0 &&m <= this.I - 1 &&n <= this.J - 1) {arr.push({ x: m, y: n });}}}return arr;}清除单元格画布chipClear(i, j) {this.ctx.clearRect(this.dw * j, this.dh * i, this.dw, this.dh);}合并&动画start(i, j) {if (this.isAnimating) return;this.isAnimating = true;this.imgIndex++;if (this.imgIndex > this.imgList.length - 1) this.imgIndex = 0;let _this = this,dst = 0,timer = setInterval(() => {let resArr = _this.countAround(i, j, dst);resArr.forEach((item) => {_this.chipClear(item.x, item.y);// 清除单元格_this.chipDraw(_this.imgList[_this.imgIndex], item.x, item.y); // 绘制下一张图片});if (!resArr.length) {clearInterval(timer);_this.isAnimating = false;}dst++;}, 30);}大功告成,这样就实现了一个炫酷的碎片式切图效果了~
文章插图
最后喜欢的同学欢迎点个赞呀,想要查看源码的同学快来公众号回复碎片吧~
经验总结扩展阅读
- 8首教宝宝认识小动物的童谣
- 教宝宝探索浮力奥秘4步走
- 6妙招,教你巧预防宝宝皮肤过敏
- 教宝宝认识大自然试试这几个方法
- 5步训练法 教宝宝爱上爬行
- 最好的早教是怎样的
- 1 人人都懂的HTML基础知识-HTML教程
- 蓝气球手表调时间教程?
- 小米手表Color2怎么连接手机_连接手机方法教程
- 银杏在佛教中的寓意


